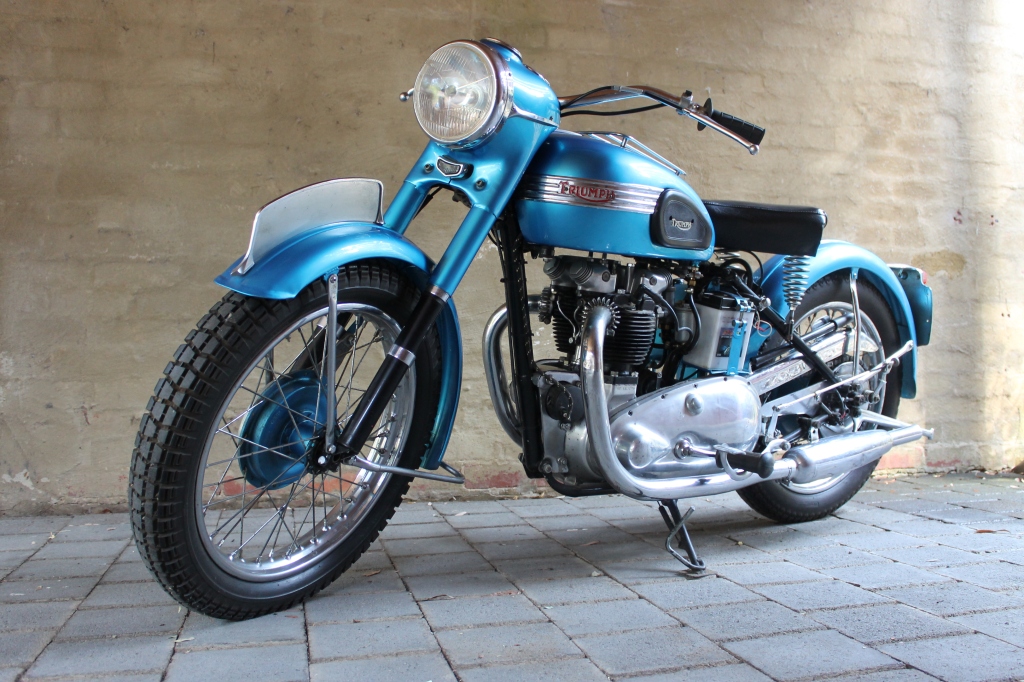
1952 Triumph Thunderbird 650cc

1952 Triumph Thunderbird 650cc
This of course then became an addiction and I acquired a 1952 650cc Triumph Thunderbird which looked complete, but in fact the guy I bought it from had obviously dismantled the engine, discovered problems and reassembled with only one piston and con rod.
I magnamiously decided no point in challenging him, and subsequently completed a full and total dismantling and began a rebuild.
HISTORY OF DEFECTS ENCOUNTERED DURING RESTORATION of TRIUMPH THUNDERBIRD
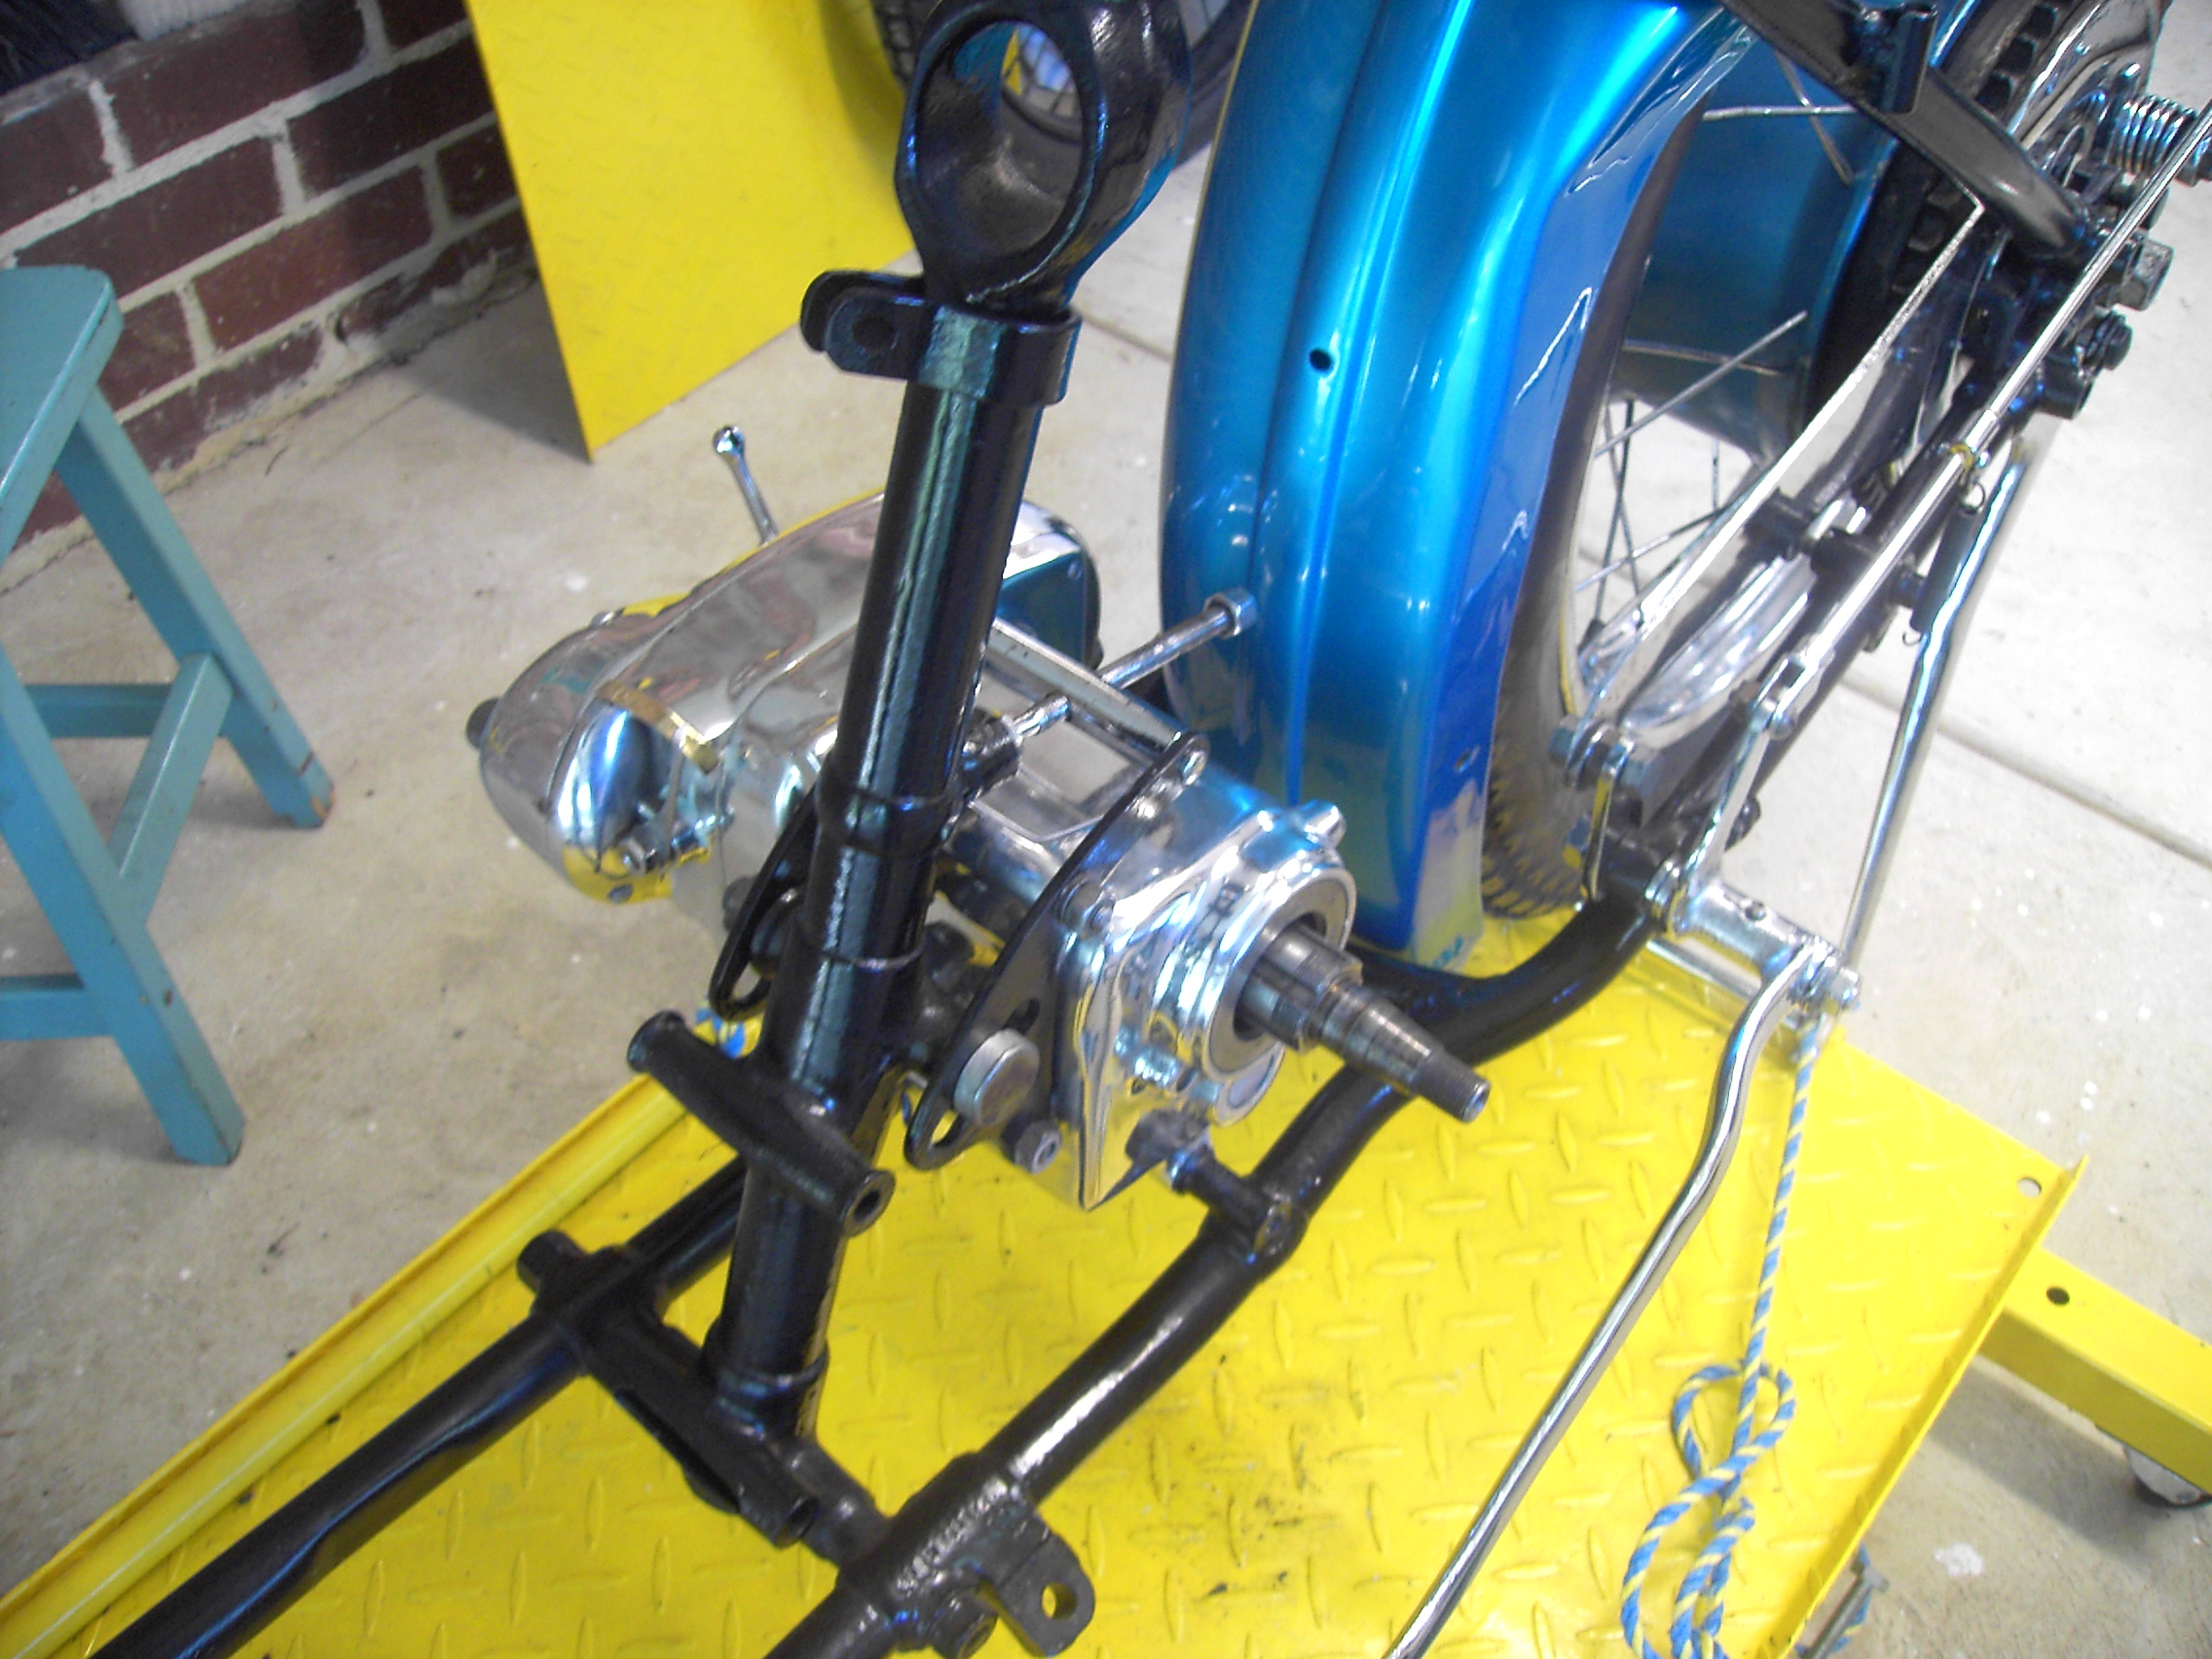
TELESCOPIC FORKS
It was a challenge compressing the spring on reassembly, I made a compression jig to allow cap nut to be fitted. See photos below;


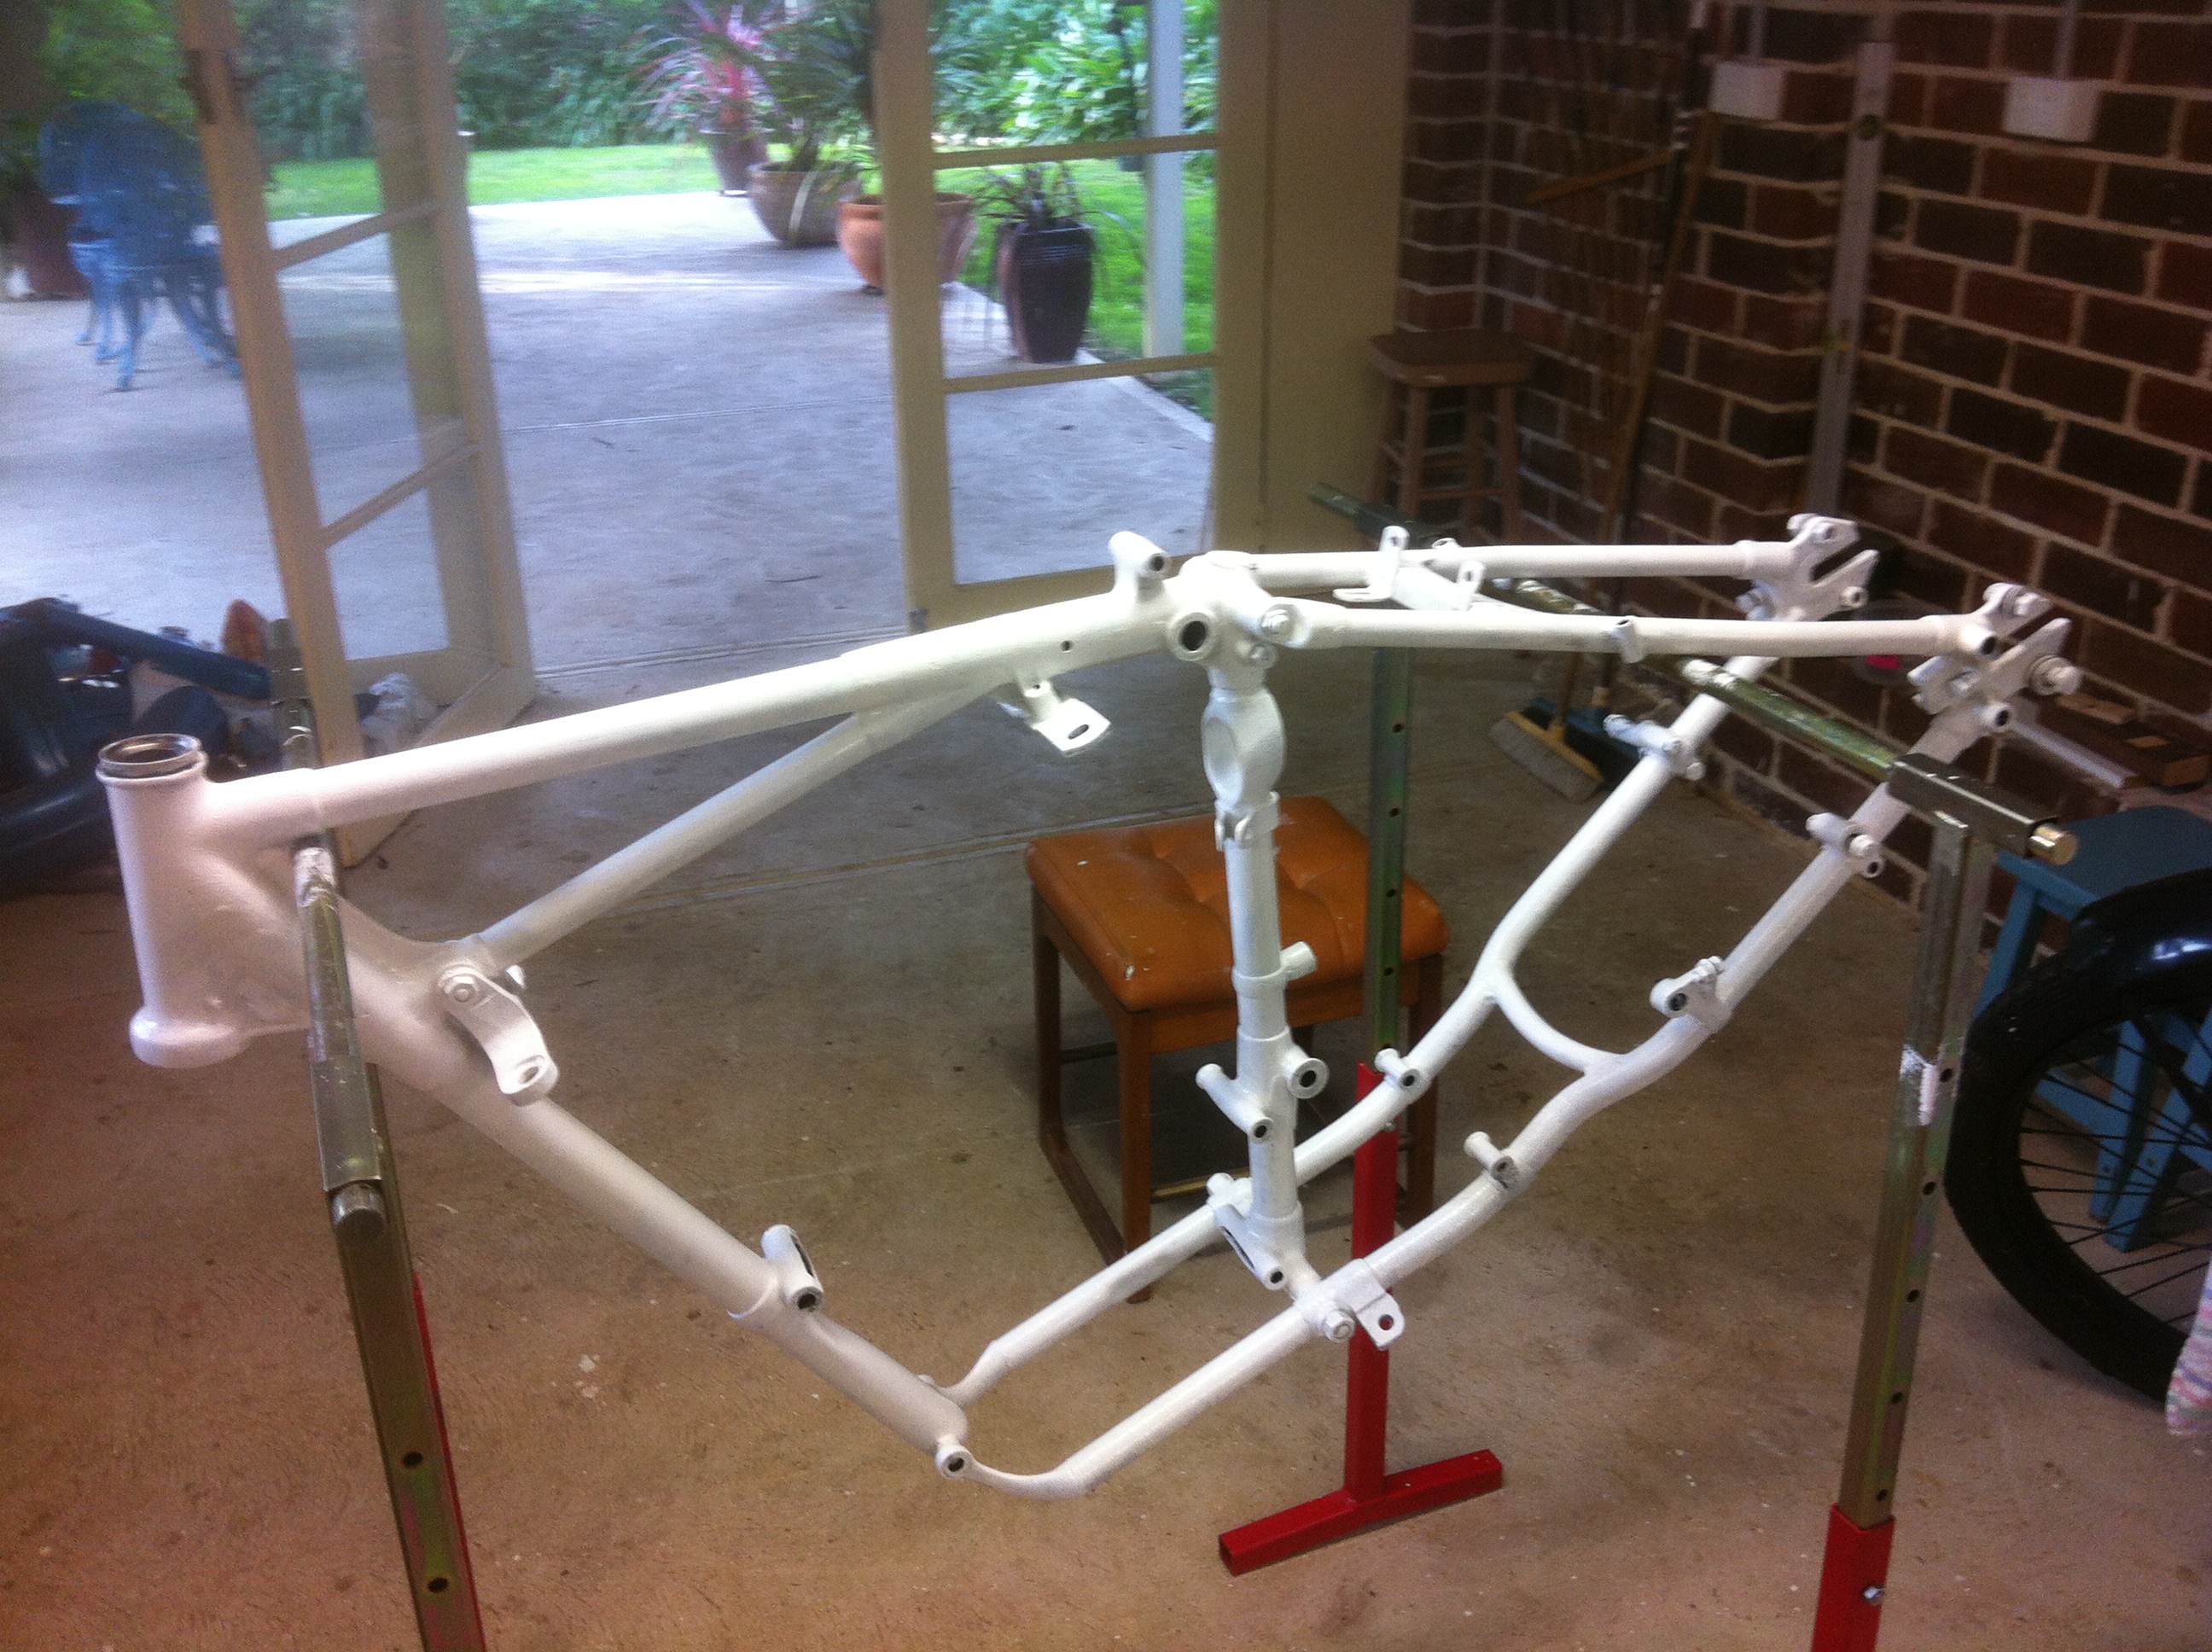
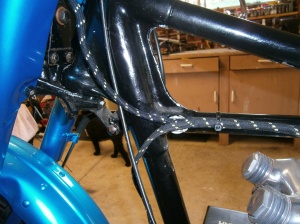
FRAME
Frame was undercoated then final enamel coat applied

TELESCOPIC FORKS REPLACEMENT TO FRAME
This is where my jig to compress springs was invaluable, refilled forks with oil (125mm) difficult to start cap nut with fine thread, established best method was with a 38mm socket, now on to wheel replacement.
I found with current bike stands very unstable decided to place lifting lugs in workshop ceiling and tie off much more stable and safe.
Modified as below which allows for unimpeded access


Section of rear guard installed together with bike stand needed to make a jig to expand spring;


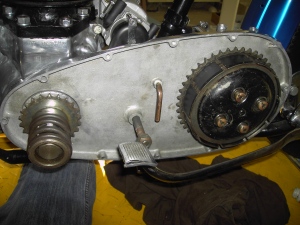
GEAR BOX
With gearbox installed in frame I was not happy with gear selection and decided to dismantle again I established that there were no rollers for the gear control cam plate will try to source.
Sourced another gear box as I was not happy withe gear selector plate. Dismantled and decided to use the gear selector plate from the second gear box
Assembled OK requires a degree of dexterity
See photos


CLUTCH REMOVAL


CLUTCH HUB
To separate the gear box from the fixed frame, I experienced great difficulty in removing the Clutch Hub, during the attempt I mangled the special tool, mangled home made puller, used lots of gas to heat and in desperation eventually cut clutch hub with grinder, I was able to purchase a replacement.
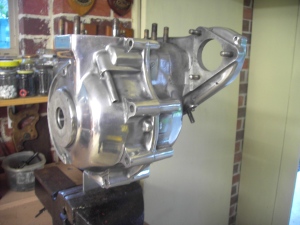
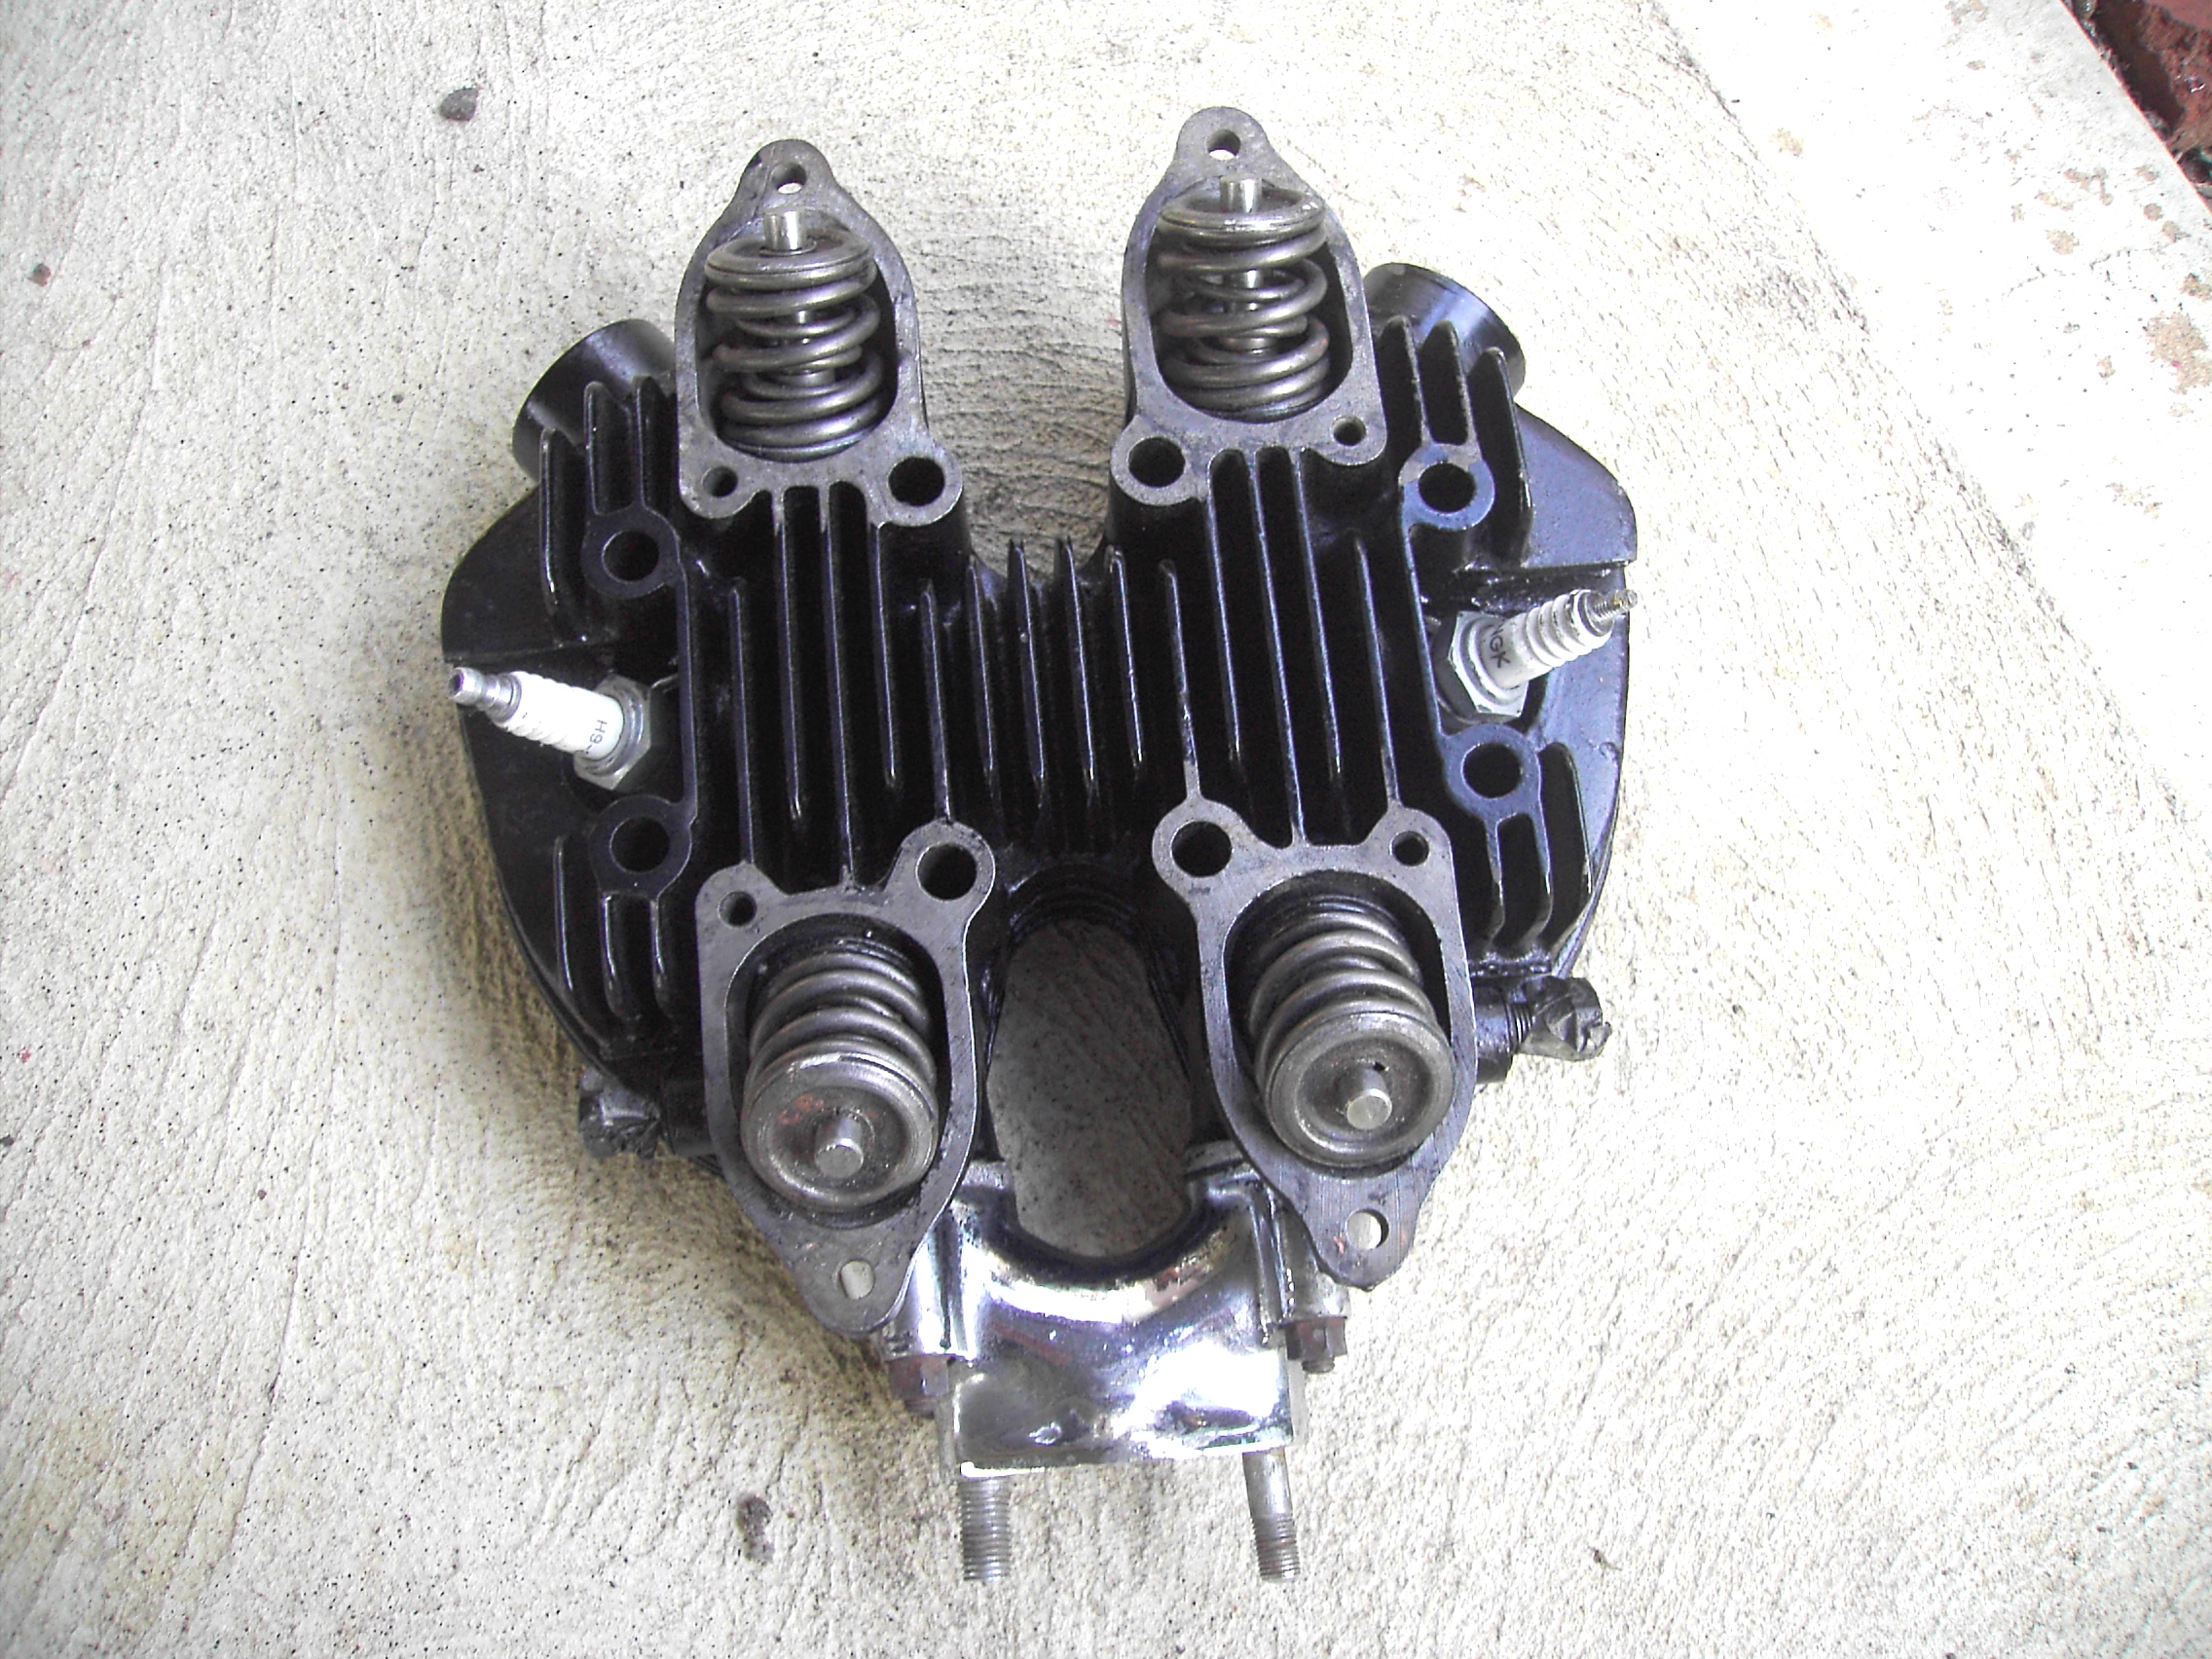
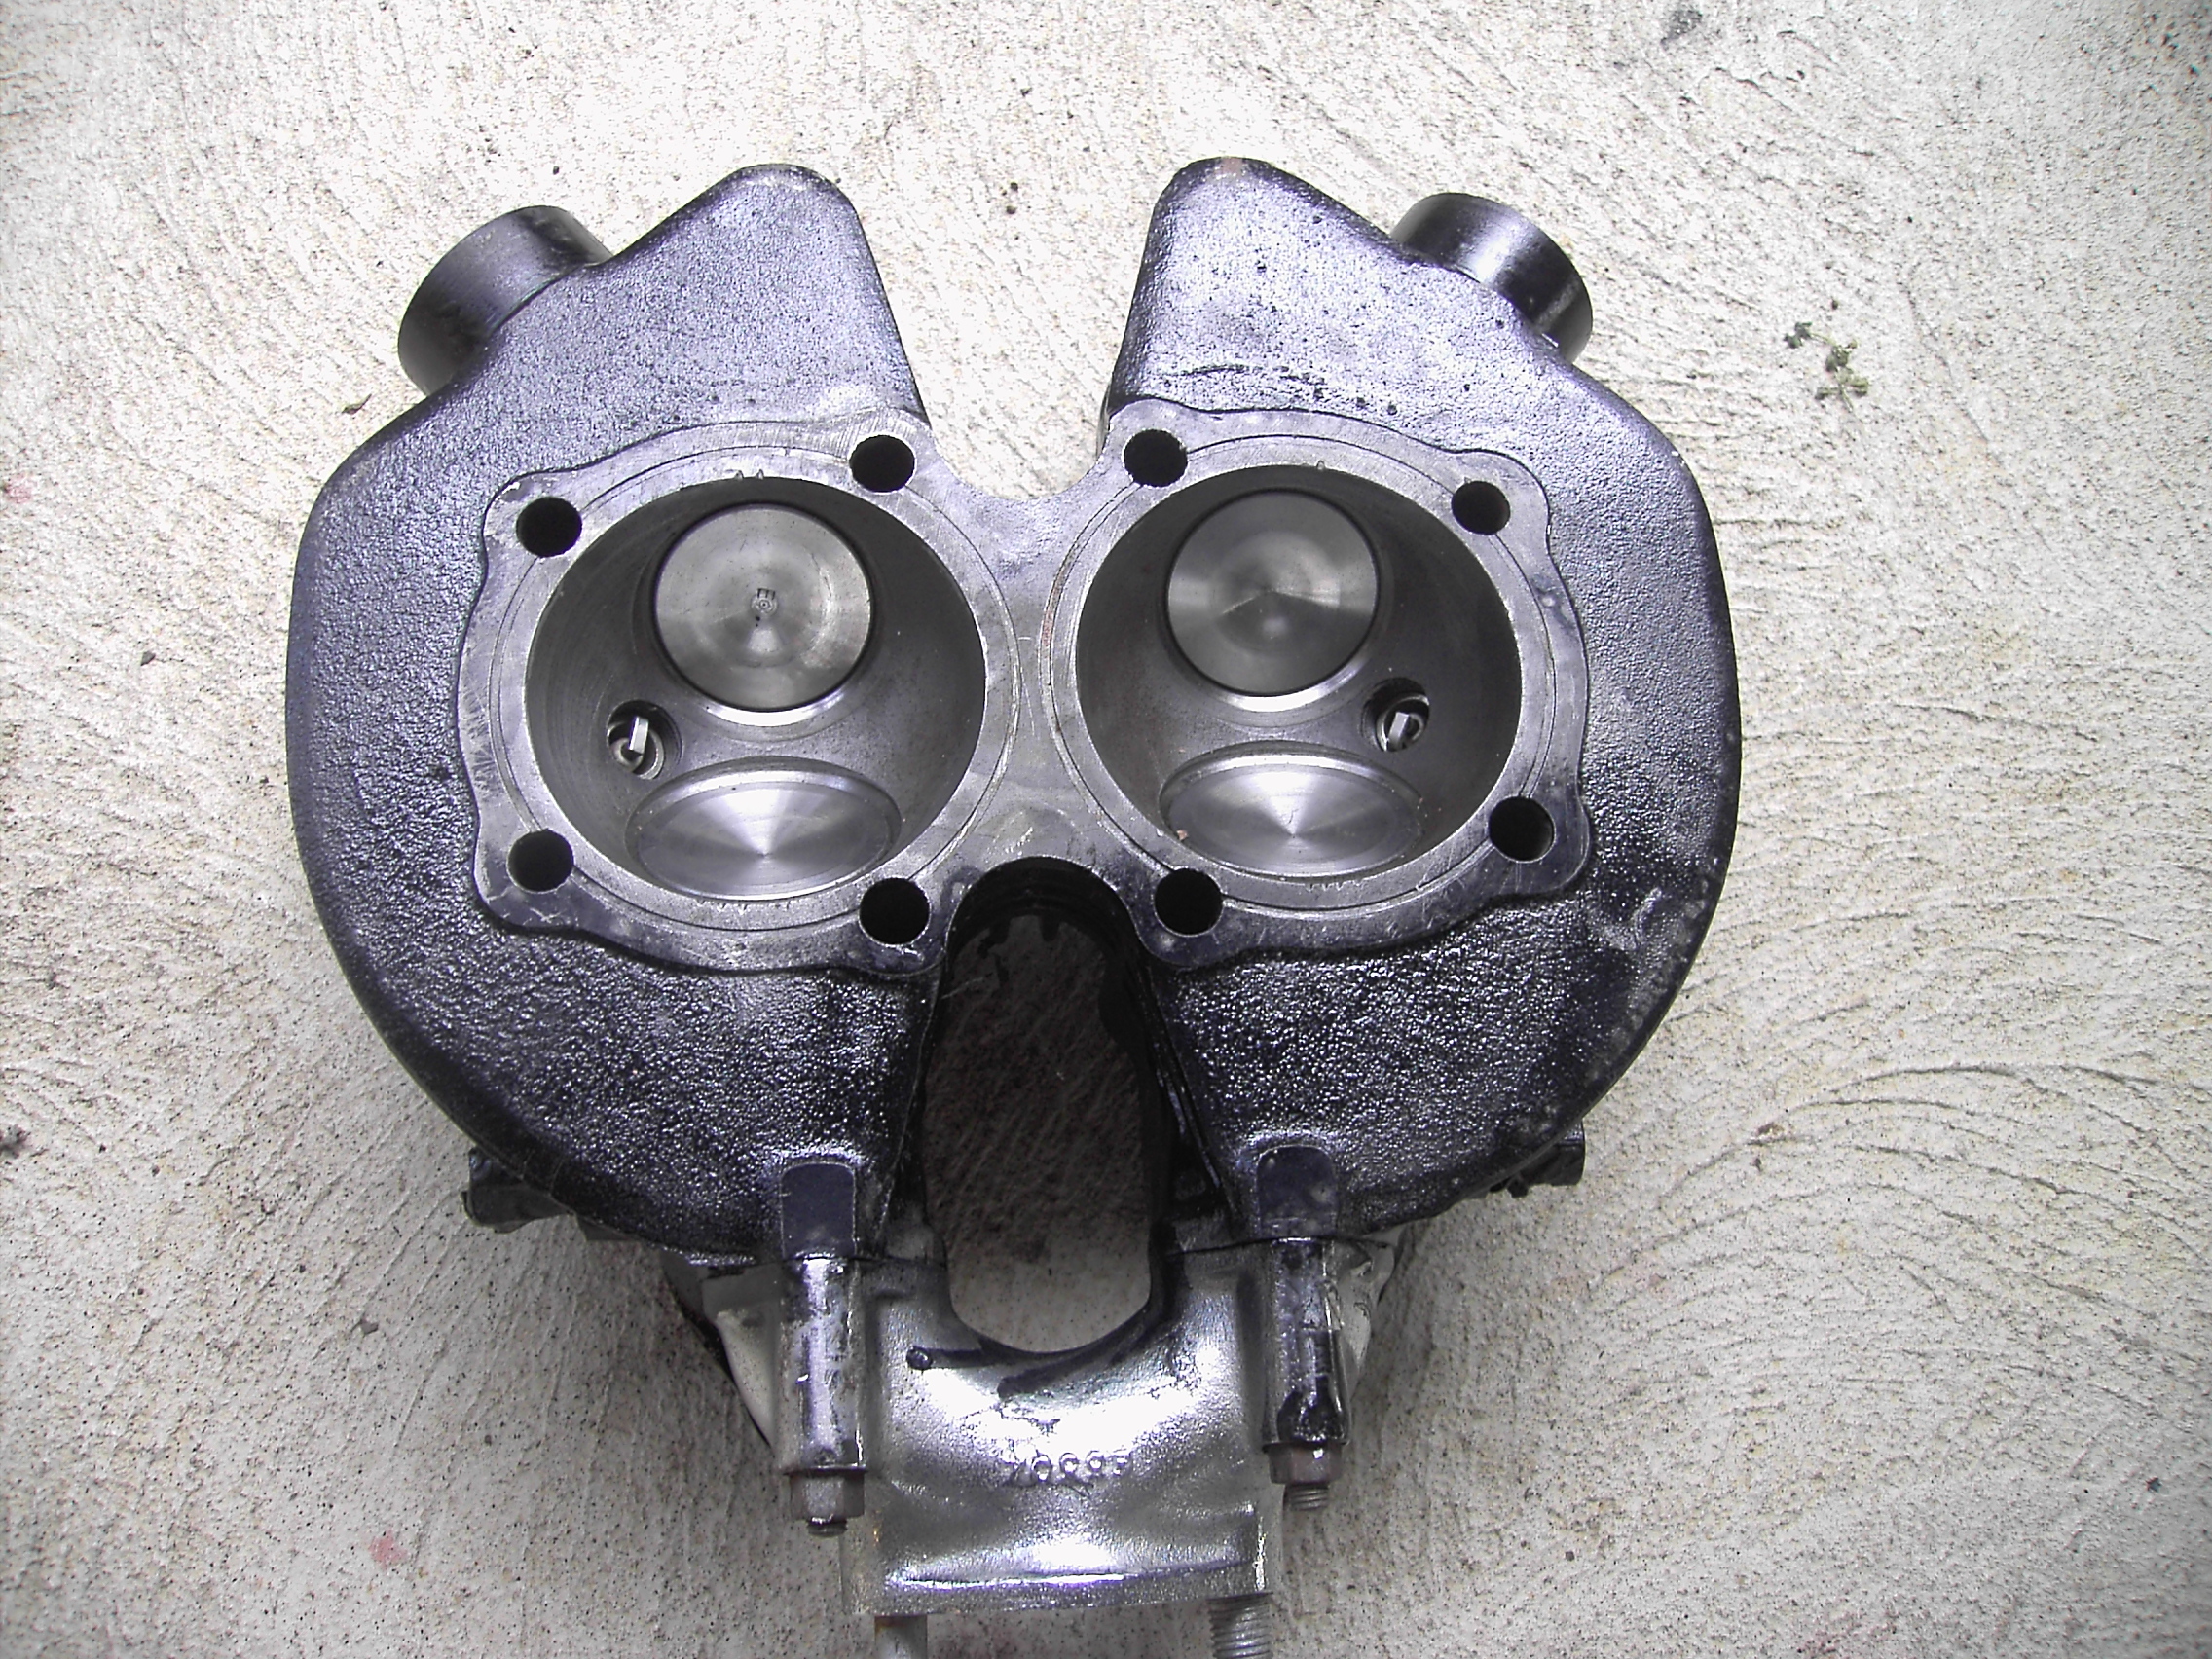
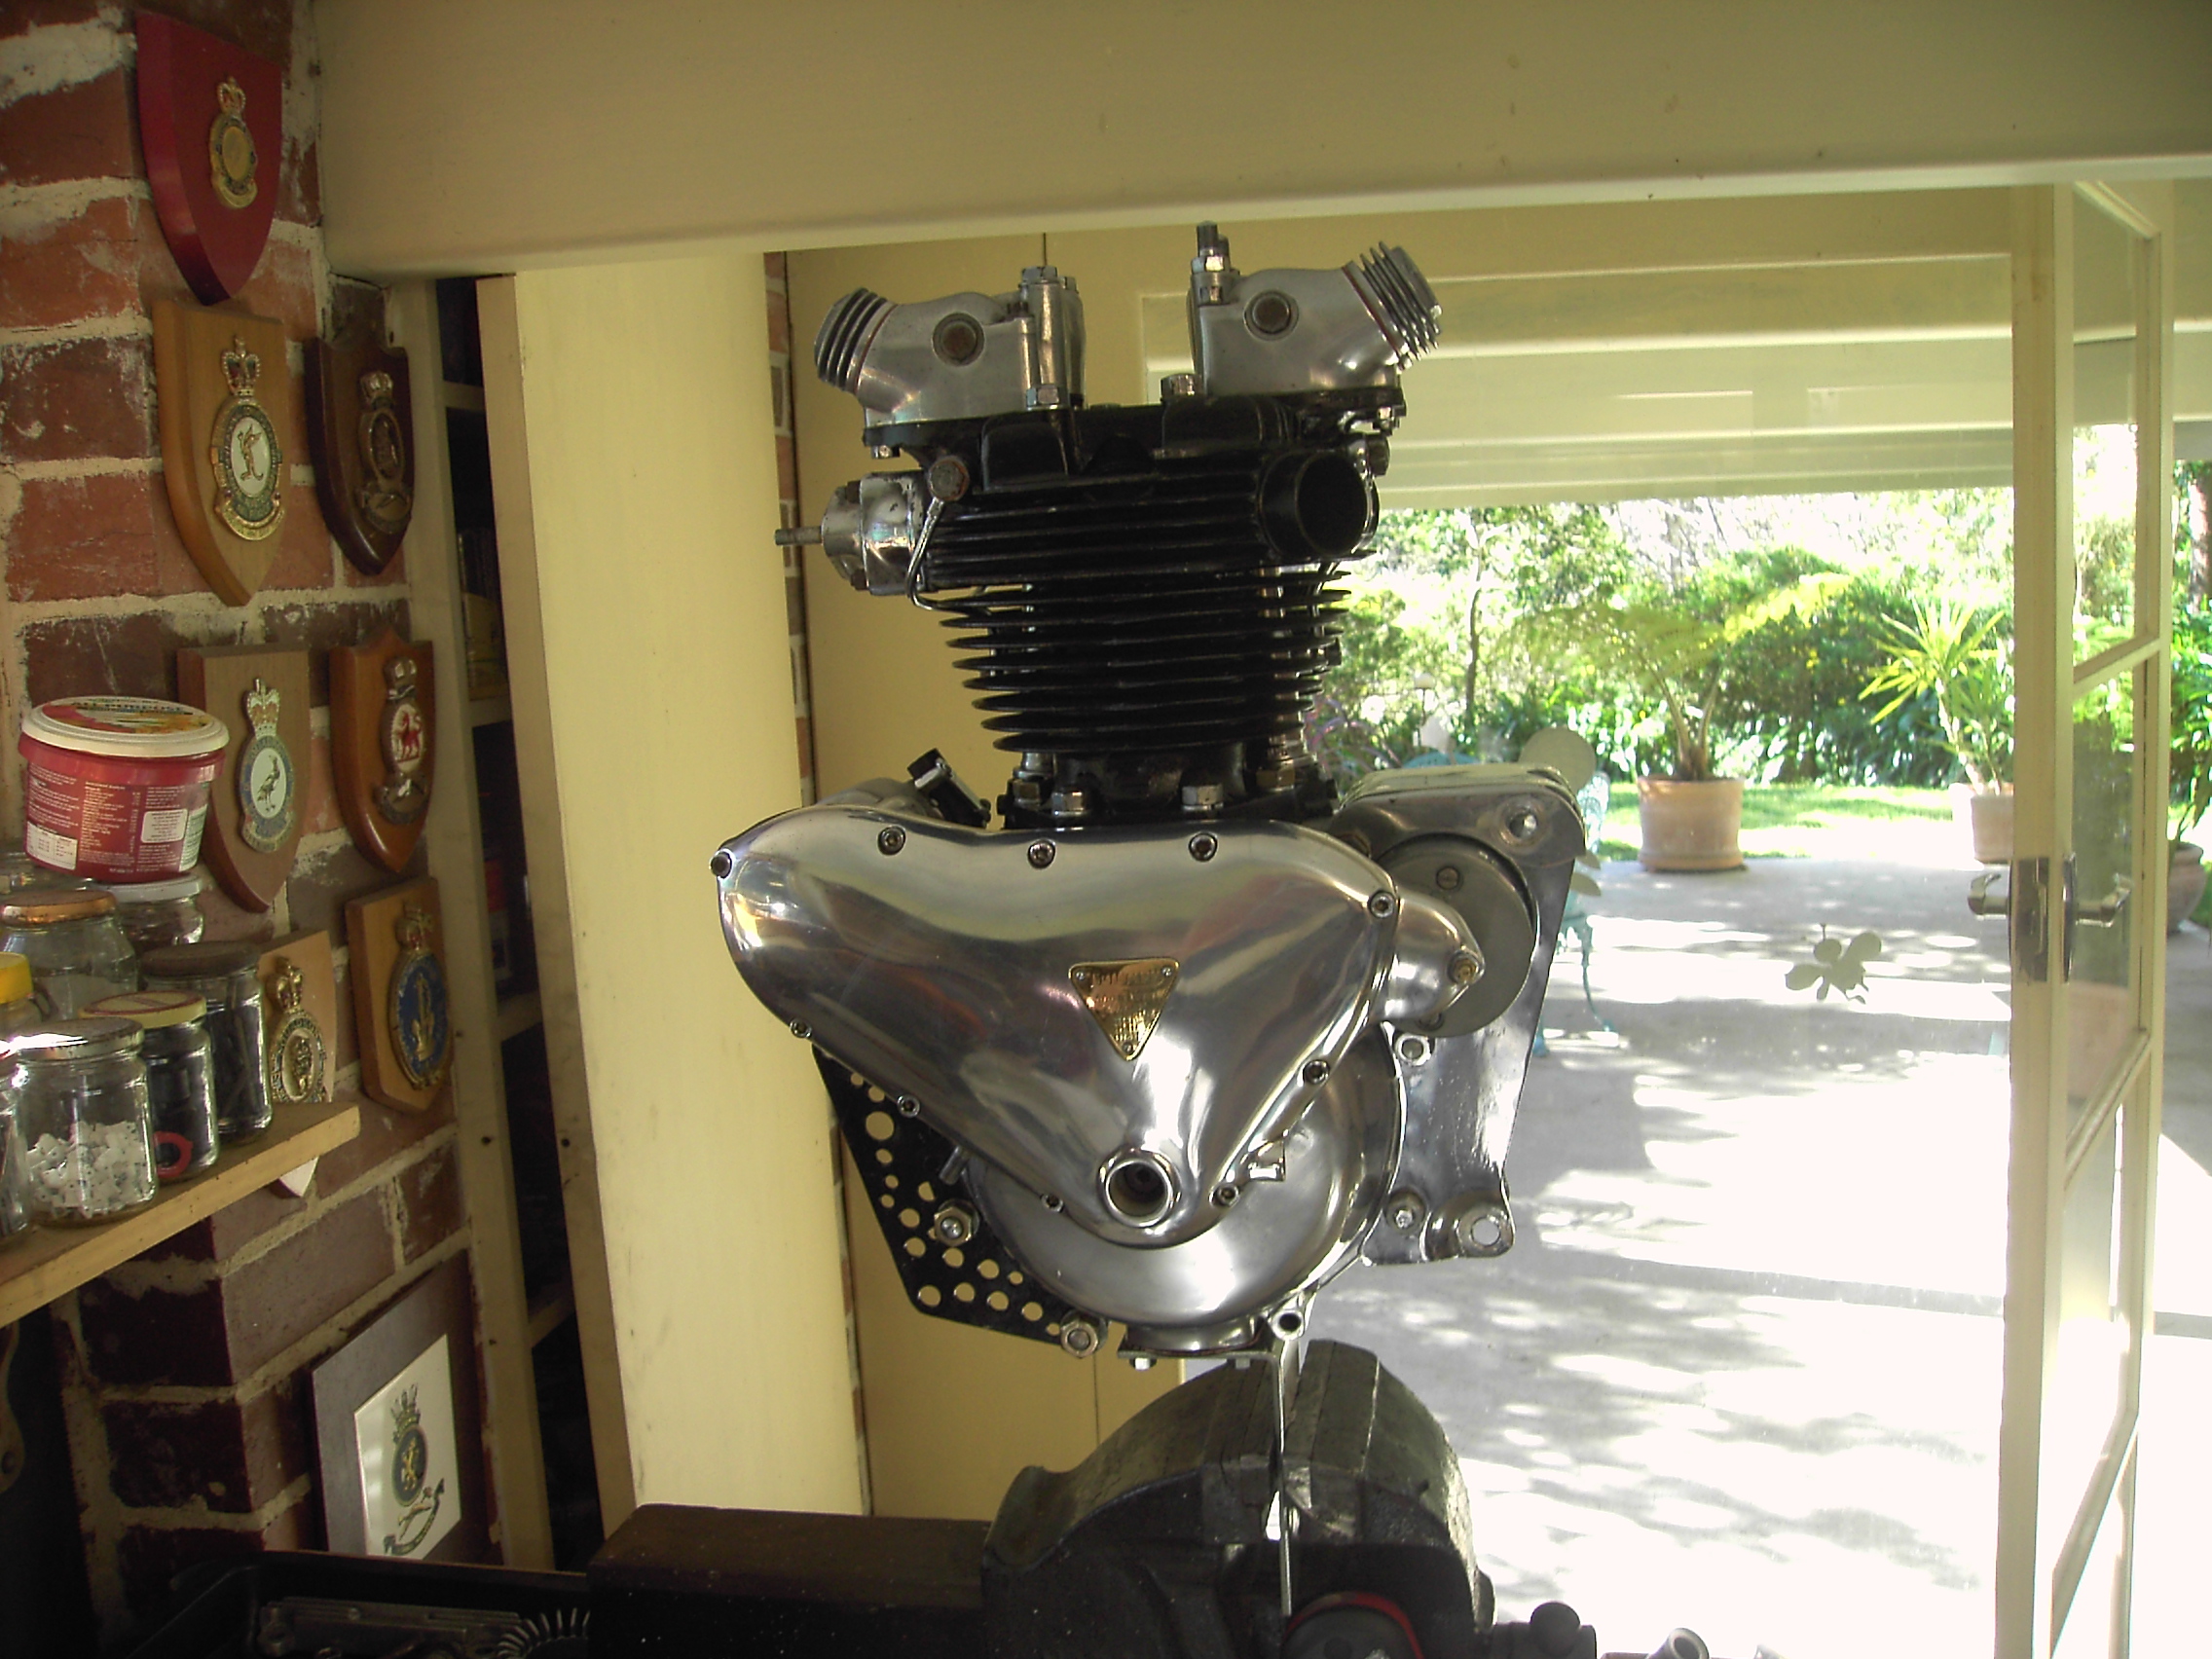
ENGINE
With the gearbox and clutch separated, you are able to remove the primary chain case cover, which then allows easy access to engine, the cylinder head was removed and to my horror it exposed the damaged cylinder block, I was able to source another block


Union Jack motorcycles who specialises in Triumph's. was a very good source for all of the replacement of damaged components
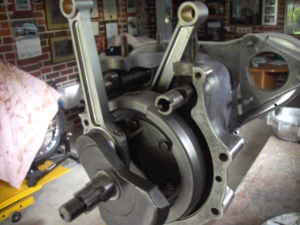
Difficulty was experienced in sourcing another con-rod, but eventually located Crankshaft Rebuilds Blackburn Victoria, who replaced both con rods with a generic type and fitted slipper bearings instead of white metal.
Crankshaft was rebalanced with crankshaft journals machined and cylinder bores honed a first class job and very helpful.
Important to mark con rod and crankshaft to ensure con rod matches crankshaft journal.
The modifications from white metal to fitting of slipper bearings on the crankshaft journals resulted in the final dimensions as follows;
Original specification for 6T
- Big End 1.4360 inches
- Modified 1.408 inches
- Con Rod internal diameter with slipper bearings 1.409 inches
- Gudgeon pin hole 0.688 inches
- Gudgeon pin 0.687 inches
- Bore Diameter 2.7953 in ches
- Modified 2.806 inches
- Purchased Pistons 2.803 inches
Removed old crank shaft bearings with hydraulic press replaced with the following
- KSM bearings made by Minamiguchi Seiko Co Ltd
- RMS8-2RS ball bearing OD 2.5 inches ID 1 inch width 3/4 inch
- RMS9-2Rs ball bearing OD 213/16 inch ID 11/8 inch width 13/16 inch


There are three issues that have not been raised before;
- Crankcase scavenger pipe damaged with a section missing
- Crankcase oil filter and plate missing
- Crankcase breather valve missing which is incorporated in inlet camshaft.
See photo of damaged crankcase scavenger pipe 8mm diameter steel which has been severely damaged with the bottom section missing. Experiencing difficulty sourcing replacement.
Needs to be formed to fit crankcase filter.
Whilst searching for these components which are difficult to source I made a bracket to assist in engine reassembly
Finally located engine scavenger pipe and crankshaft breather valve and can start assembly.
As a matter of interest I was able to locate two but in one case had to take half a crankcase which is available to anyone
Commenced reassembly crankshaft breather fits in the inlet camshaft
Attached mounting plates for frame


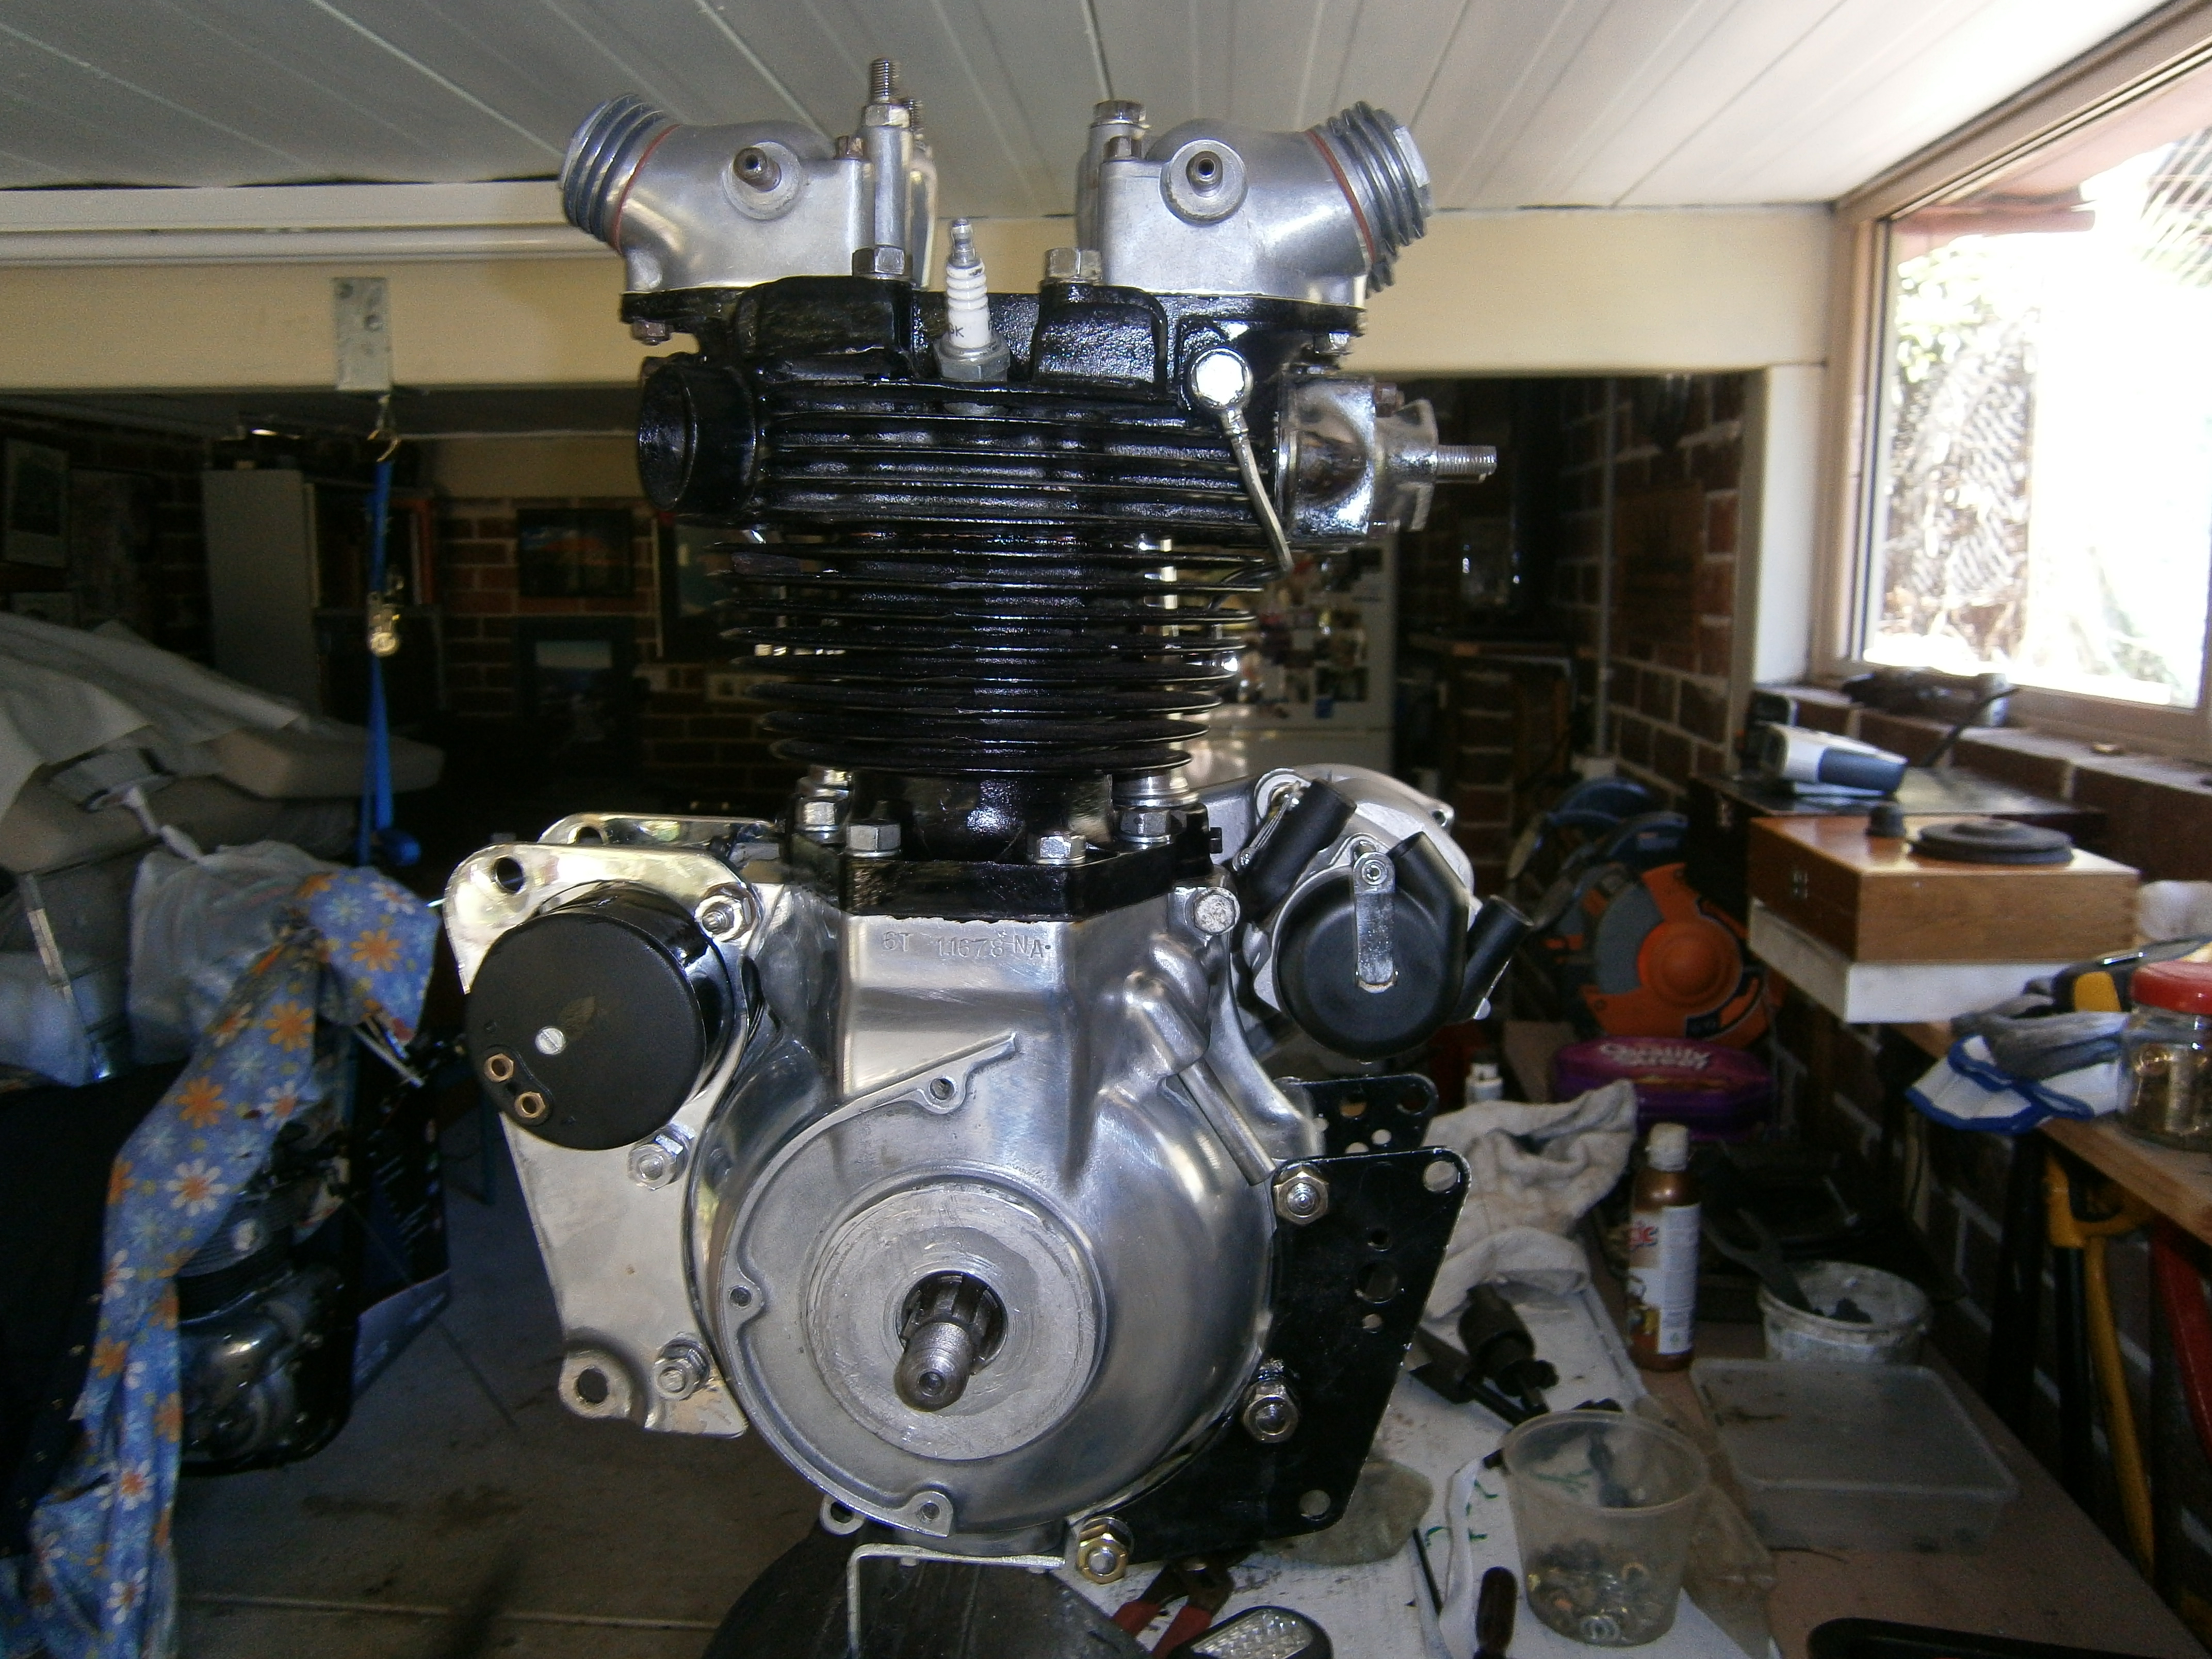
Timing of Engine and Magneto
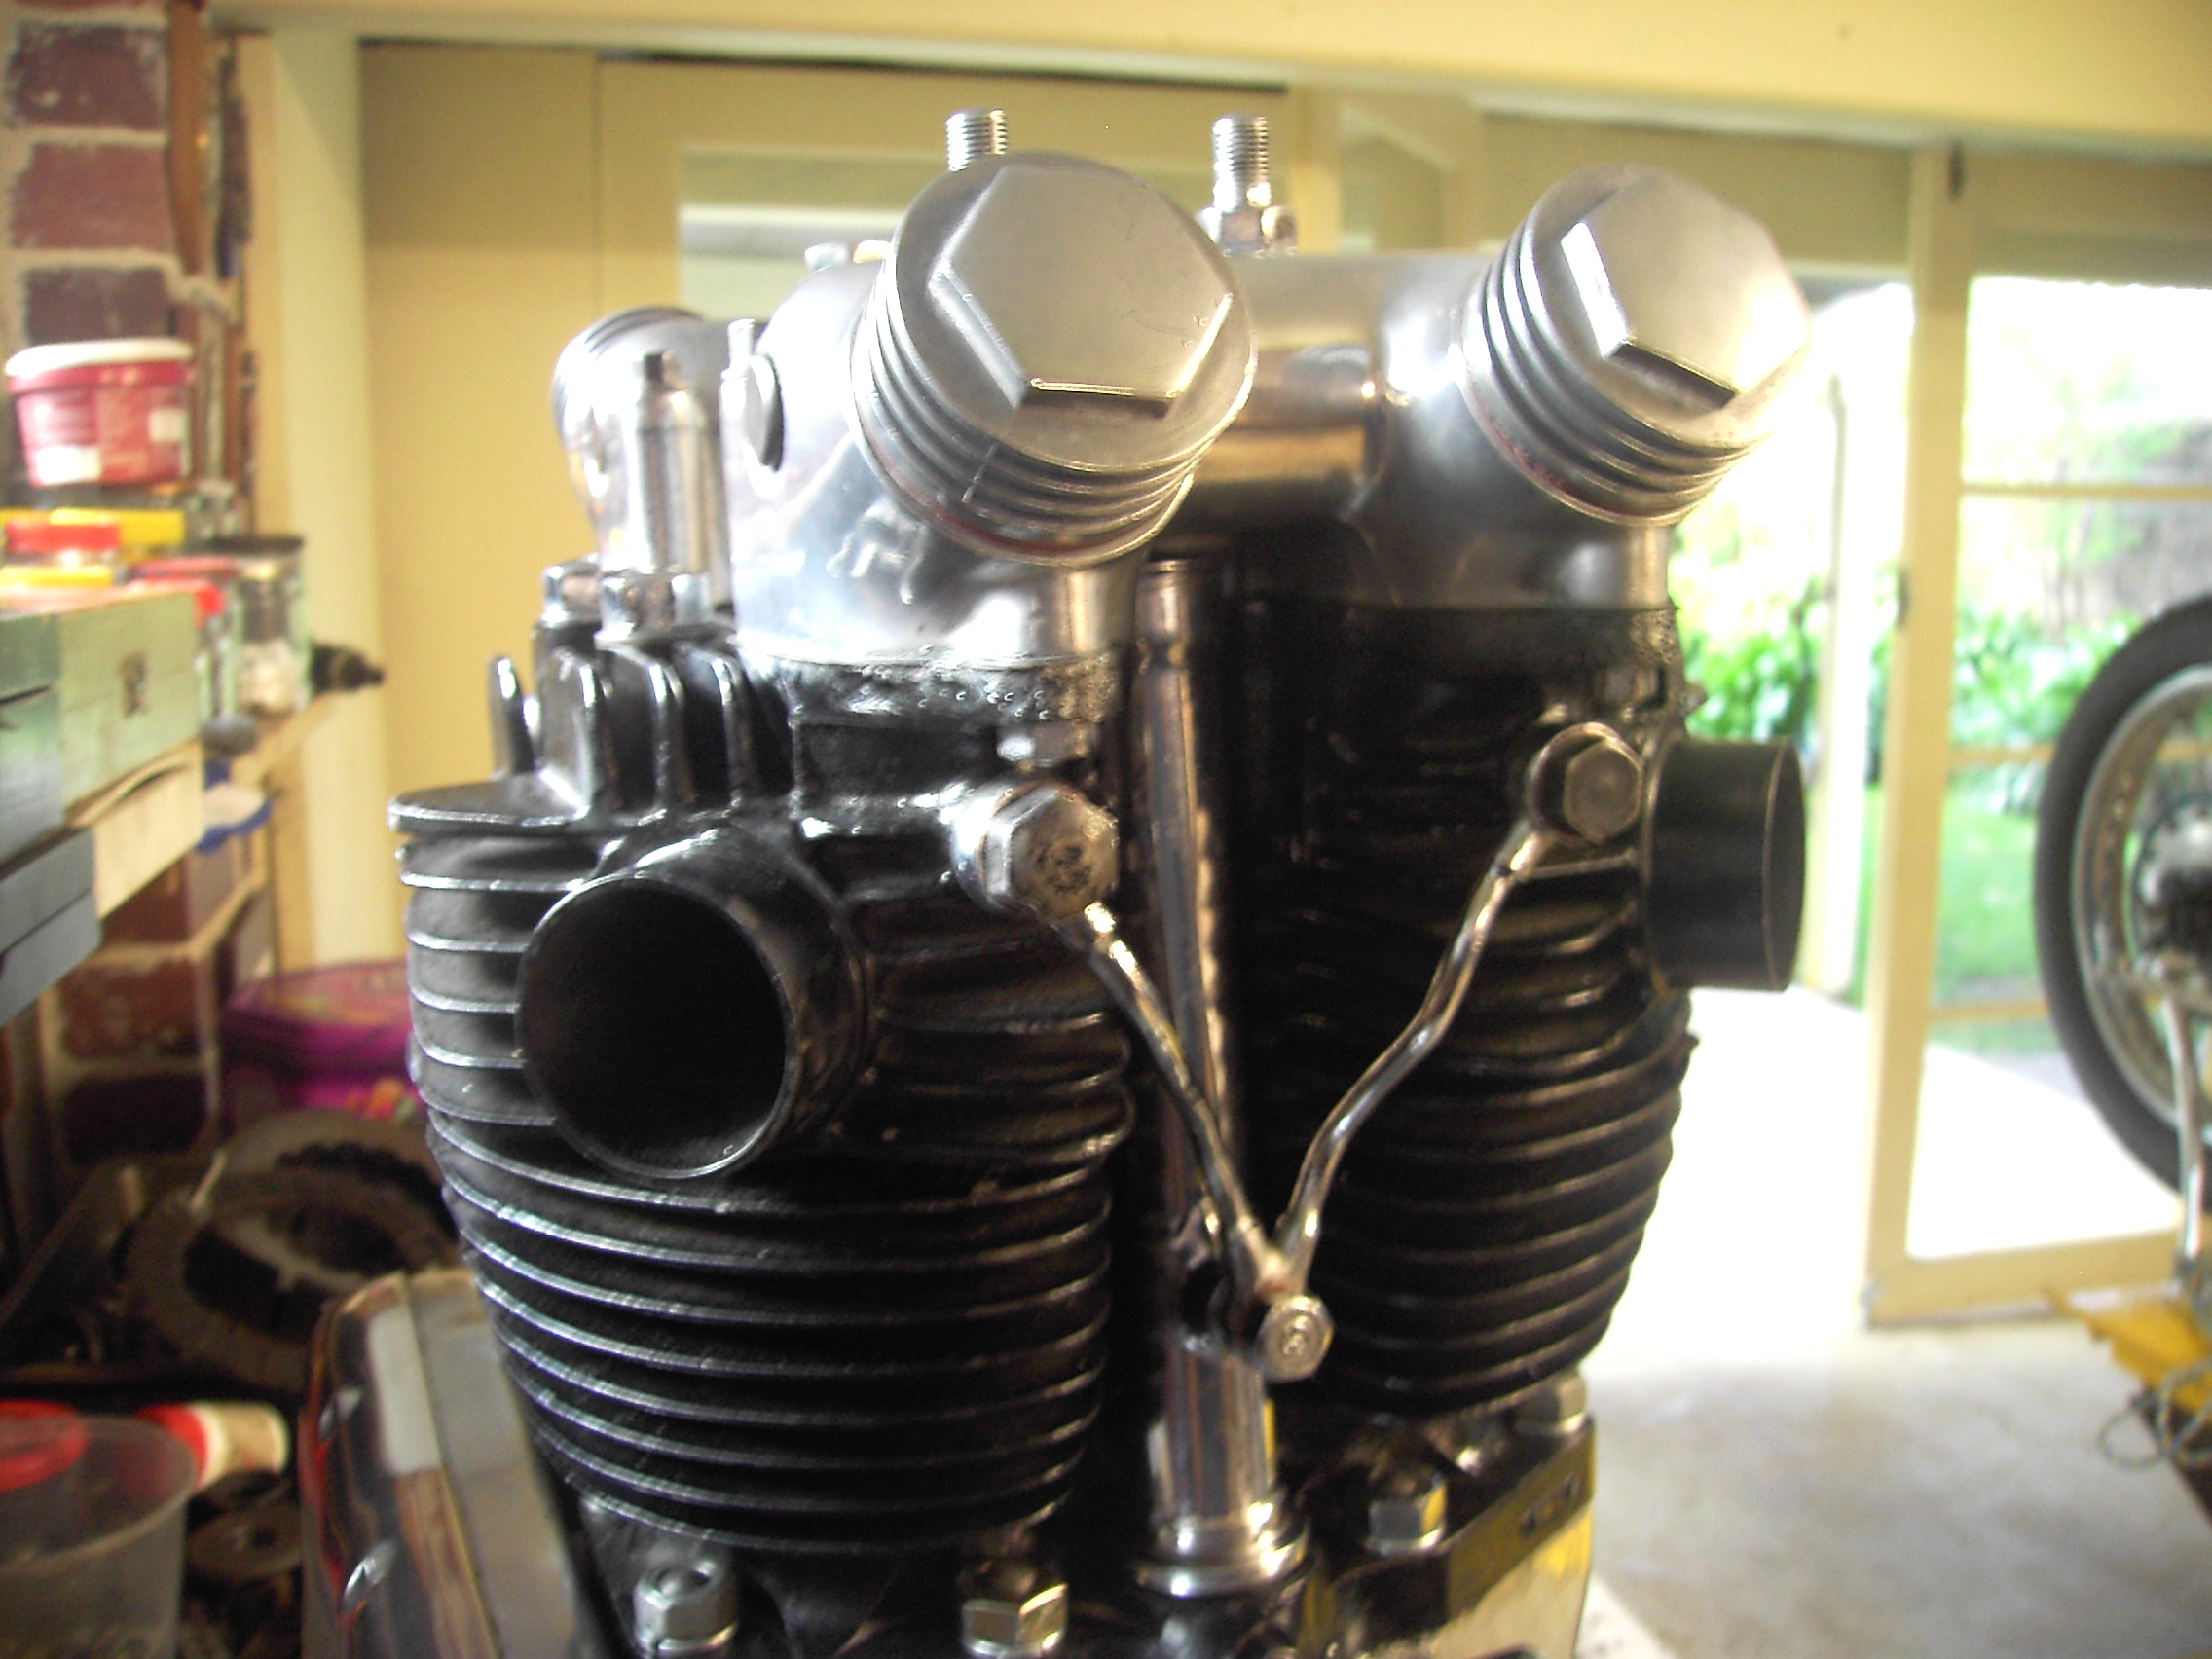
The photos below show the engine with timing gears in place also assembled valve tappets assembly
Purchased triumph valve tappet spanner as it is difficult to access nuts for adjustment customised ring spanner to facilitate easier access.
All complete all I need is assistance to place in frame
With help from my son engine is now in frame


WORKING PLATFORM
Started assembly front guard then gear box relatively easy only need to remember to place primary chain tensioning device


ELECTRICAL
Magneto was rewound, poles re-magnetised, cleaned, fitted new brushes and bench tested. Dynamo had the common armature skimmed undercut and polished.
Regulator was refurbished and then bench tested with dynamo.


WIRING
Started the wiring of nacelle but prior to that drew a wiring diagram which has enabled the wiring to proceed see diagram and the slow progress


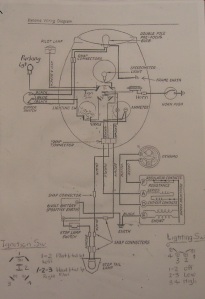
Completed wiring was able to locate a cloth wiring loom lots of patience required to action as per diagram
FINAL ASSEMBL


However I have taken photos with bike at this stage


All I am waiting on now is returned of exhaust system and choke lever from chrome plater
Exhausts received and installed.
Started bike OK but trouble with oil relief valve we believed purchased new replacement also changed oil pump,
problem still exists with pressure indicator showing no pressure
Examination revealed that crankshaft bush on timing gear casing worn to such extent 20 thous
Had timing gear casing machined to accommodate a modified seal see photo

Kicked over and started runs well


Lot of hard work
ReplyDelete[…] He can now return to his Triumph 1951 Thunderbird rebuild (having seen my blog he has decided to run one also at Jeffreybuilds) […]
ReplyDeleteJeff, Great rebuild, love the Triumph, I was looking at the scavenger pipe on the Triumph, does this have to be sealed when replace, i bought a set of cases with out and was wonder any special way of fitting, thanks regards Peter
ReplyDelete